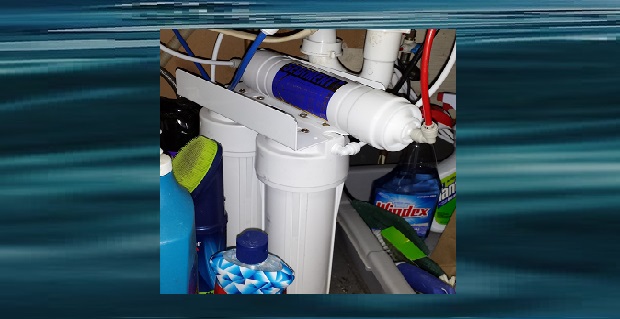
Filter Housings Demo: How to Set Up, Maintain & Even Fix Them
Published by Alkaline Water Plus
If you have a water filter which uses filter housings, or are considering buying a water filtration system, then this post is something you should take a look at. I am a big advocate of filtering water, and so want to spend some time here teaching you about filter housings. With the right tools and guidance it doesn’t require an expensive plumber to set up and maintain your water filters, even if you have to fix the filter housings [as I show you in the third video].
Whether you just bought your water filtration system or it’s time for your yearly maintenance, it is about the same procedure. I produced the following three filter housings demo videos to illustrate the ease of how to set up, maintain and even fix filter housings.
Filter Housings Demo # 1:
To get ready to change your filter housings you will need a special filter housing wrench. This tool is the right material and shape to work with standard-sized filter housings. You can find tools like this at most hardware stores, or you can buy it from me.
For Convenience-Sake Get some extra-long hosing: One trick I have learned to do [to keep the filter housings’ maintenance the easiest] is to install extra-long hosing on each end of the filter housing. This allows me to pull the assembled, pressurized system up on my counter-top or out onto the floor in front of the cabinet for a few days so I can check for leaks. I sell NSF certified filter hosing for this purpose and can customize the lengths for you, but you can also purchase hosing from your local hardware store wherever they sell water filters.
To Make Your Filters Perform their Best & Last the Longest: I recommend that you purchase an in-line sediment filter and place that somewhere in the line prior to your main filter housings. The sediment filter is extremely inexpensive [right now these are on sale for only $3.99 each] . These can be installed with simple quick-connect fittings that you can buy at any local hardware store.
Sediment filters will catch rust and other sediment particles and remove them from the water, saving the life of your more expensive filters. Sediment filters should be changed about every 6 months.
The next step is to unscrew the filter housings using the filter housings wrench. Here is the first video which demonstrates this.
In the above video I also demonstrate: how to examine the filter housings to make sure there aren’t any cracks or crimps in the O-rings. This is important, because the O-ring is providing the seal for the filter housing and if it isn’t in perfect shape you can predict that sometime soon you will spring a leak. A leak under your sink could go unnoticed and do a lot of water damage before you notice it. But it’s easy to prevent this disaster by following the steps in this blog post.
Which Filters to Install
The two filters which I am installing today are the “Supercarbon” [catalytic carbon] filter for chlorine & chemicals and the fluoride filter [activated alumina]. I like these two filters for my water because I am very picky about removing all of the fluoride, chlorine and chemicals, and these extra filters help.
Keep in mind I drink [and share with others] a lot of water and this set-up lasts me about a full year of great-tasting and perfectly filtered water.
There are other types of filters that can be installed, depending on your needs/wants and water quality. If I didn’t have such great filters in my water ionizer I would want to install a heavy-metal/sulphur/iron filter, called KDF85. and if I had questionable source water I would want a bacteria/algae/fungus filter.
More about all the filter possibilities and instructions about filters, in general, can be found on this page:
https://alkalinewaterplus.com/water-filtration-basics/
Filter Housings Demo #2:
In this short video I demonstrate the following:
1. The filters and filter housings all have embossed arrows to help guide you to know which filter to place first or which way is up when installing a new filter.
2. I demonstrate how to use the special filter tool to tighten up the filters to be tight enough, without being too tight.
3. I show you how simple it is to re-insert the hosing into the filter housing’s quick-connect fitting.
Filter Housings Demo #3:
This final filter housings demo shows how to replace the quick connect fittings if they break and also how to use plumbers tape. It is not necessary to screw the fitting all the way in. Screw it in until it feels tight, then check the filters for a day or two after installation to ensure there is no leaking.
Then if a leak develops, tighten up the fitting some more. If you use a pliers, make sure to be very careful and to turn slowly. Don’t over-tighten.


